


Pigeons at the Railway Station, linoprint 10×15 cm
I have already made a picture about this theme with collage technique. Then I thought it would look good as a linoprint as well and decided to do a reduction lino that I have never done before.
First of all, I redrew the theme in size 10×15 cm and also drew the mirror image on a piece of lino.

Pigeons lino sketch, 10×15 cm
The process of reduction lino is that you carv first the parts that are going to be white – or better to say that the colour of your paper. Then you can print the first colour, in this case it’s grey.
I created a template as well, so that the different layers of colours would be printed on the same part of the paper. It could have been a longer lasting wooden one, but #stayathome so I used what I had – cardboard.

Lino is ready for the first layer of ink
After a few test prints, I was working with a beautiful 220g Fabriano paper, but it took some time to learn the tricks how the paint would be really pressed onto the paper. I used 200g Canson mixed media paper for my Xmas linos, and that behaved a bit differently.
The next step was to carve out the part from the lino that were to stay grey, and it was ready for the next layer the black paint.

Lino and prints are ready for the next layer of paint – black
Again test prints and experiments so that the second layer of paint pressed well onto the first grey one.
For the last colourful layer I used a different, stamp-like technique and carved the pattern into a simple eraser. I covered the grey-black parts with a tracing-paper.
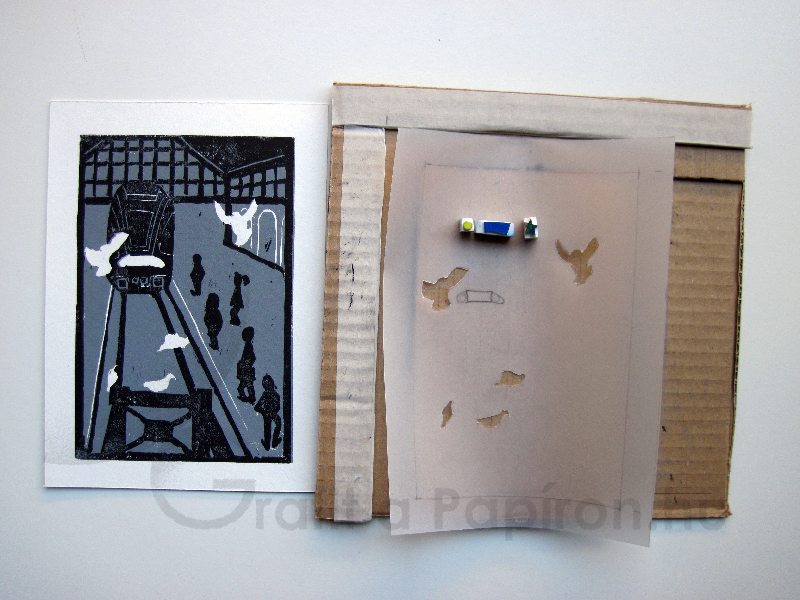
Preparations for the “colourful” parts of the lino
Finally, a bit tetris challenge-like photo about a ready linoprint and the tools used.

Pigeons at the Railway Station lino print and tools
The only task left is to pick the good ones, number and sign them according to lino print standards. As it was my first reduction lino experience, quite a few went into the garbage at every layer of paint. It turned out to be a real mini series with 5 series items, 1 artist’s proof (E.A.) and 3 items as Eastern presents (H.C.) No, I don’t want to see the number written down that from how many tests… I am simply just happy with the succeeded ones and the experience of the process.
Related: